Are you a busy professional struggling to find time for a healthy vegan lunch? Do you often find yourself grabbing unhealthy options or skipping lunch altogether? I get it! Finding time to cook a nutritious meal during a hectic workday can feel impossible. But what if you could enjoy delicious, plant-based lunches that are ready in minutes, even on your busiest days? This article is your guide to 7 quick and easy vegan lunch recipes, perfect for busy weekdays. We'll focus on meals that require minimal cooking, maximum flavor, and all the nutrients you need to power through your day.
Why Meal Prepping This Recipe Saves You Time & Money
Let's be honest, time is our most valuable resource, especially during the work week. Spending hours in the kitchen prepping lunch is not an option for many of us. That's where meal prepping comes in. Meal prepping these recipes saves you significant time and money by:
Reducing Decision Fatigue: Knowing exactly what you're going to eat for lunch each day eliminates the daily decision of what to eat. This simple change frees up mental space and reduces stress.
Preventing Unhealthy Choices: When hunger strikes, it's easy to grab the quickest, unhealthiest option. With prepped vegan lunches, you always have a nutritious meal ready to go, keeping you on track with your health goals.
Saving Money: Eating out frequently for lunch can be a significant expense. Preparing your meals at home is almost always more budget-friendly, allowing you to save money for other things you enjoy.
For example, let's say you typically spend $15 per day on lunch. Over a five-day work week, that's $75. With meal prepping, you could prepare these vegan lunches for a fraction of the cost, perhaps $30-$40, saving you $35-$45 weekly. Over a month, that's a substantial saving. Imagine what you could do with that extra money!
Here's where it gets interesting... consider the health benefits beyond the financial ones. Prepping a balanced vegan lunch helps maintain a healthy weight, boosts energy levels, and improves overall well-being. Eating a plant-based diet is linked to a lower risk of chronic diseases like heart disease and type 2 diabetes. Meal prepping makes this accessible and achievable, even with a packed schedule.
Let's dive into the meal prep instructions.
Ingredients for a Week of Meals
To get you started, here's a general list of ingredients you'll likely use across the 7 recipes. Remember to adjust quantities based on your appetite and preferences. Many of these ingredients can be purchased in bulk to save even more money!
Grains: Quinoa, brown rice, or couscous (cook a large batch at the beginning of the week)
Legumes: Canned chickpeas, black beans, lentils (rinsed and drained)
Vegetables: Pre-cut salad greens, cherry tomatoes, cucumbers, bell peppers, carrots, avocados
Fruits: Berries, apples, oranges, bananas
Protein: Tofu (pre-cooked and cubed), edamame, nuts and seeds (almonds, pumpkin seeds, etc.)
Dressings/Sauces: Hummus, tahini, vegan vinaigrette
Spices: Salt, pepper, garlic powder, onion powder, paprika, etc.
Meal Prep Containers: Meal Prep Containers are essential for storing your prepped lunches. They come in various sizes and materials. Opt for BPA-free, microwave-safe containers for convenience. This investment is key for keeping your food fresh and easily transportable. I've found that the ones with separate compartments work really well for preventing soggy salads!
Here's a handy tip: Make a master grocery list before heading to the store. This will save you time, help you stick to your budget, and ensure you have everything you need. Look for sales and consider buying in bulk when possible, especially for pantry staples like grains, beans, and spices.
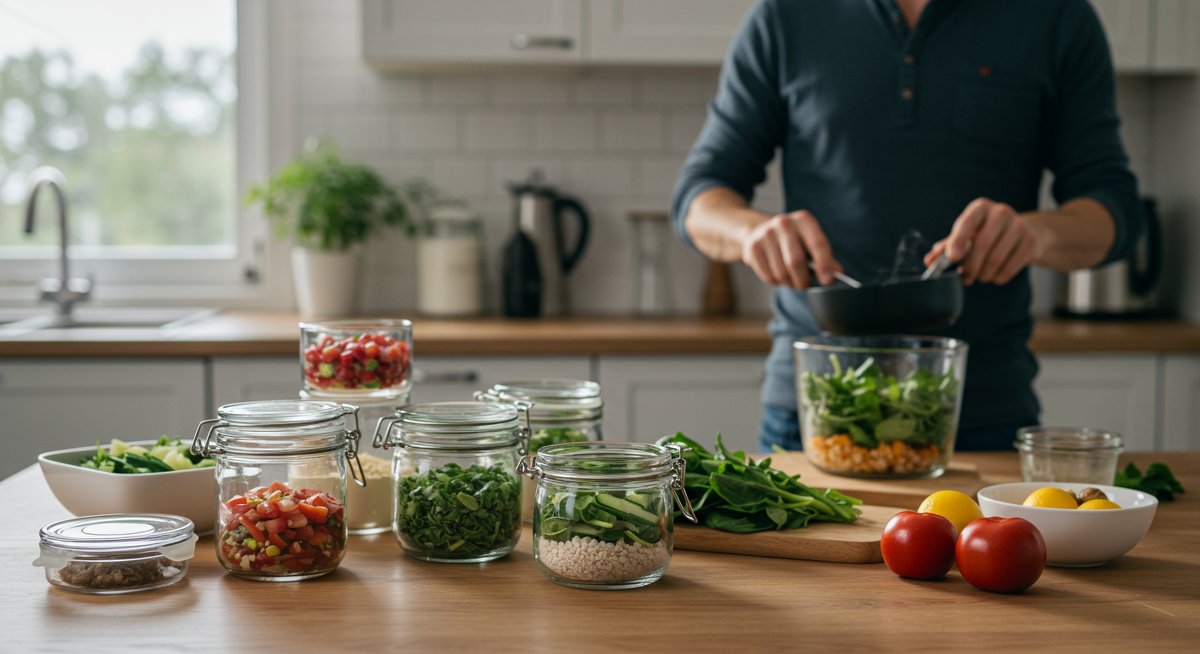
Step-by-Step Meal Prep Instructions
Here's a sample meal prep plan you can adapt. Adjust the recipes to your liking, and feel free to mix and match. The key is to create a system that works for you.
Day 1: Prep the Base
- Cook Grains: If using quinoa, brown rice, or couscous, cook a large batch according to package directions. Let it cool completely.
- Prepare Protein: If using tofu, press it to remove excess water. Cube and pan-fry or bake it with seasonings like garlic powder and paprika.
- Wash and Chop Vegetables: Wash and chop all your vegetables (cucumber, bell peppers, carrots, etc.). Store them in separate containers.
Day 2: Assemble the Lunches
- Recipe 1: Quinoa Salad with Chickpeas and Veggies: Combine cooked quinoa, chickpeas, chopped vegetables, and a simple vinaigrette in your meal prep containers.
- Recipe 2: Black Bean and Corn Salad: Mix black beans, corn (canned or frozen), chopped tomatoes, and a lime dressing. Serve with avocado slices.
- Recipe 3: Tofu Lettuce Wraps: Sauté seasoned tofu with your choice of veggies like bell peppers and onions. Pack with lettuce leaves and your favorite sauce.
Day 3: Pack the Rest
- Recipe 4: Lentil Soup: Prepare a big batch of lentil soup and portion into containers.
- Recipe 5: Hummus and Veggie Wraps: Spread hummus on whole-wheat tortillas. Add your favorite chopped veggies and wrap them up.
- Recipe 6: Peanut Noodles: Prepare the noodles and the peanut sauce and mix them together. Add veggies and tofu.
- Recipe 7: Smoothie Bowl: Pre-portion ingredients for a smoothie bowl (frozen fruit, spinach, etc.) into separate containers. Pack toppings (nuts, seeds, granola) separately. In the morning, blend the smoothie base and add your toppings.
Remember, you can adjust the quantities and recipes to fit your dietary needs and taste preferences. Don't be afraid to experiment and find what you enjoy most! The most important thing is to have healthy options readily available.
Storage Tips for Freshness
Proper storage is crucial to keep your prepped meals fresh and appealing throughout the week. Here's how to make sure your lunches stay delicious:
Airtight Containers: As mentioned above, using airtight containers, like Meal Prep Containers, is essential. This prevents your food from drying out and helps maintain its flavor. The separate compartments are great for keeping wet ingredients separate until it's time to eat!
Refrigeration: Store all prepped lunches in the refrigerator immediately after assembling them. Aim for a temperature of 40°F (4°C) or below.
Strategic Layering: When assembling salads or other dishes with multiple components, layer ingredients strategically to prevent sogginess. Place the dressing at the bottom of the container and add the greens last. This way, the greens won't get soggy too quickly.
Refrigeration Times: Most prepped lunches will stay fresh for 3-5 days in the refrigerator. Be mindful of the shelf life of individual ingredients. For example, avocado might brown quickly; consider adding it just before eating.
Proper Cooling: Before sealing your meal prep containers, allow hot foods to cool down to room temperature. This prevents condensation buildup, which can affect the texture and quality of your meals.
Here's an insider tip: If you plan on including avocados in your meal prep, squeeze a bit of lemon or lime juice over the avocado slices to prevent them from browning. It helps to keep them looking fresh and appealing.
Reheating and Serving Ideas
Even with minimal cooking, you might need to reheat some of your prepped lunches. Here are some easy ways to do so and serving suggestions:
- Microwave: Most meal prep containers are microwave-safe. Check the label to be sure. Reheat your lunch for 1-2 minutes, stirring halfway through, until heated through.
- Stovetop: Soups and stews can be reheated on the stovetop. Pour the contents of your container into a small saucepan and heat over medium heat, stirring occasionally.
- Oven: Some dishes, like baked tofu or roasted vegetables, can be reheated in the oven for a few minutes for a crispier texture.
- No-Heat Options: Many of the recipes, like salads and wraps, are delicious cold. Pack a small container of dressing or sauce separately to add just before eating.
Serving ideas are also important. Add a side of fresh fruit to any meal, such as a banana or an apple. You can also prepare a batch of whole-grain crackers and hummus for a quick and healthy snack alongside your lunch.
Here's a simple trick: if you are reheating a dish that tends to dry out in the microwave, add a splash of water or broth before heating. This will help keep the food moist and flavorful.
Nutritional Information Per Serving
While the exact nutritional information will vary depending on the specific recipes you choose and the portion sizes, here's a general overview to give you an idea of the health benefits:
- Calories: Aim for lunches that range from 400 to 600 calories per serving. This is a good range for most adults to feel satisfied without overeating.
- Protein: Ensure each lunch provides at least 15-20 grams of protein. This will keep you feeling full and satisfied. Good sources include tofu, lentils, chickpeas, and edamame.
- Fiber: Aim for at least 8-10 grams of fiber per serving. Fiber helps with digestion, keeps you full, and helps regulate blood sugar. Include plenty of vegetables, fruits, and whole grains.
- Healthy Fats: Include a source of healthy fats, such as avocado, nuts, or seeds, to support brain function and overall health. These healthy fats help your body absorb nutrients.
For instance, a quinoa salad with chickpeas, vegetables, and a tahini dressing would typically offer around 500 calories, 20 grams of protein, 10 grams of fiber, and a good amount of healthy fats. Similarly, a black bean and corn salad with avocado might provide similar nutritional values, offering a satisfying and balanced meal.
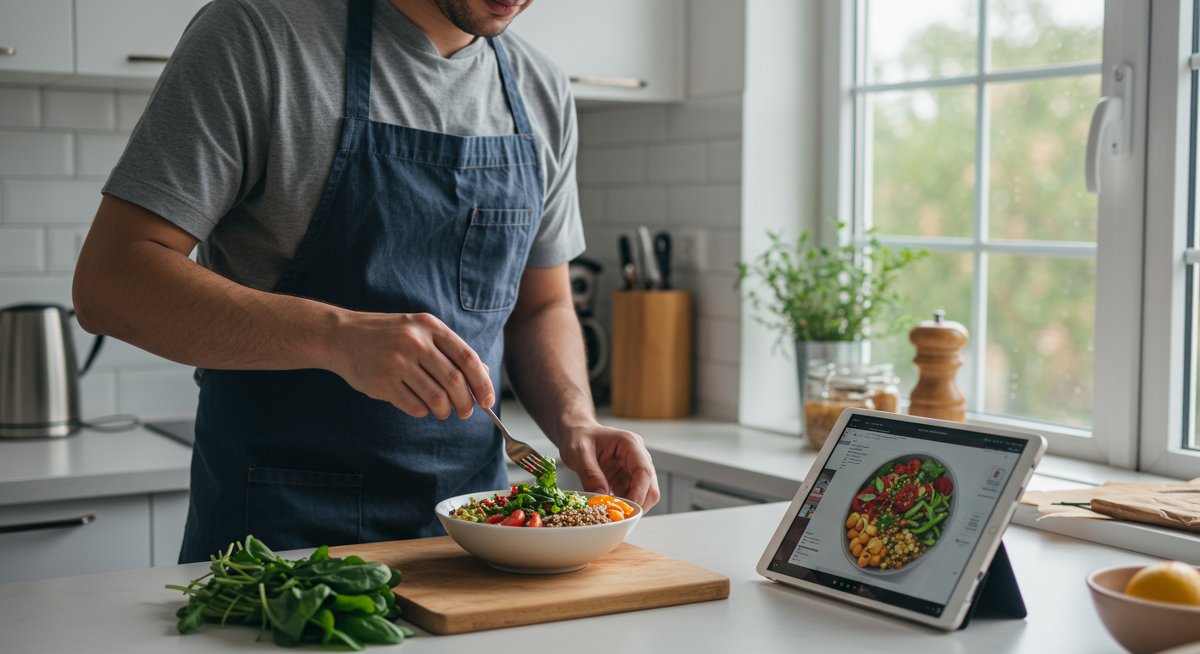
Here's a practical tip: Use a nutrition tracking app, such as MyFitnessPal, to get a more accurate estimate of the nutritional content of your recipes. This allows you to fine-tune portion sizes and make adjustments to meet your dietary needs and goals.
Customizing Your Meal Prep
The beauty of meal prepping is its flexibility. You can customize your meals based on your dietary needs, taste preferences, and what's available at the grocery store. Here are some ideas:
- Dietary Adjustments: If you have specific dietary restrictions, like gluten intolerance, use gluten-free grains, such as quinoa or brown rice. For low-carb options, focus on non-starchy vegetables, healthy fats, and protein sources like tofu and tempeh.
- Flavor Variations: Don't be afraid to experiment with different spices, herbs, and sauces. Try adding a little bit of chili powder to your tofu scramble or using a different type of dressing on your salads.
- Ingredient Swaps: If you don't like a particular ingredient, swap it out for something you enjoy. For example, if you dislike bell peppers, use other vegetables like broccoli or mushrooms.
- Seasonal Produce: Adjust your recipes based on seasonal produce. Use fresh fruits and vegetables that are in season. It will make the meals more delicious and budget-friendly.
For example, if you're not a fan of chickpeas, use black beans or lentils instead. Similarly, if you find yourself getting bored with the same flavors, try using different marinades for your tofu or experimenting with different types of dressings. The goal is to have meals you genuinely love so you stick with the meal prep plan.
Advanced Batch Cooking Strategies
Once you've mastered the basics of meal prepping, you can start exploring advanced strategies to streamline the process even further. Here are a few ideas:
- One-Pot Meals: Embrace one-pot meals to minimize cleanup. This includes soups, stews, and even grain bowls. This saves you time both in the kitchen and when it comes to washing up. This is great for those with limited time.
- Prep Components: Instead of preparing full meals, consider prepping individual components. Roast a large batch of vegetables, cook a big pot of grains, and make a big batch of dressing. Then, simply combine these components during the week to create different meals. This allows for flexibility and variety.
- Freezing: Some dishes, such as soups and stews, freeze very well. Cook double batches and freeze half for future meals. This is the ultimate time-saver. On busy weeks, simply pull a meal out of the freezer the night before. It's a lifesaver!
- Smart Grocery Shopping: Plan your meals around ingredients that are on sale. Buy ingredients in bulk when it makes sense. Take inventory of your pantry before you go shopping to avoid buying duplicates.
For example, if you're making a lentil soup, consider doubling the recipe and freezing half for a quick meal in the future. If you're roasting vegetables, roast a large batch and use them in different meals throughout the week, such as salads, wraps, or grain bowls.
Next Steps in Your Healthy Cooking Journey
Meal prepping isn't just about convenience; it's about taking control of your health and well-being. You're not just saving time and money; you're investing in your future self. You're choosing to prioritize your nutrition and make healthier choices that will energize your body and mind. So, what are you waiting for? Grab those Meal Prep Containers and get started. Experiment with the recipes, adjust them to your liking, and find what works best for you.
Consider these resources for further learning and inspiration:
- Vegan Recipe Websites: Explore websites and blogs dedicated to vegan recipes. Many offer meal prep guides, recipe variations, and expert tips.
- Meal Planning Apps: Utilize meal planning apps to create weekly menus, generate shopping lists, and track your nutritional intake. MyFitnessPal is a great option for this.
- Vegan Cookbooks: Invest in a few vegan cookbooks for inspiration and to expand your recipe repertoire.
If you're on this journey too, I'd love to hear how it goes for you. What are your favorite vegan lunch recipes? Share your experiences and tips in the comments below! Remember, every small step you take towards a healthier lifestyle is a victory. You got this!